

 Get Started
 Integrate / SDKs
 User Verification
 Business Verification
 Transaction Monitoring
 Changelog
Role and processing location
Need a DPA, TOMs, or other compliance attestations? Contact your Didit representative.
Retention controls
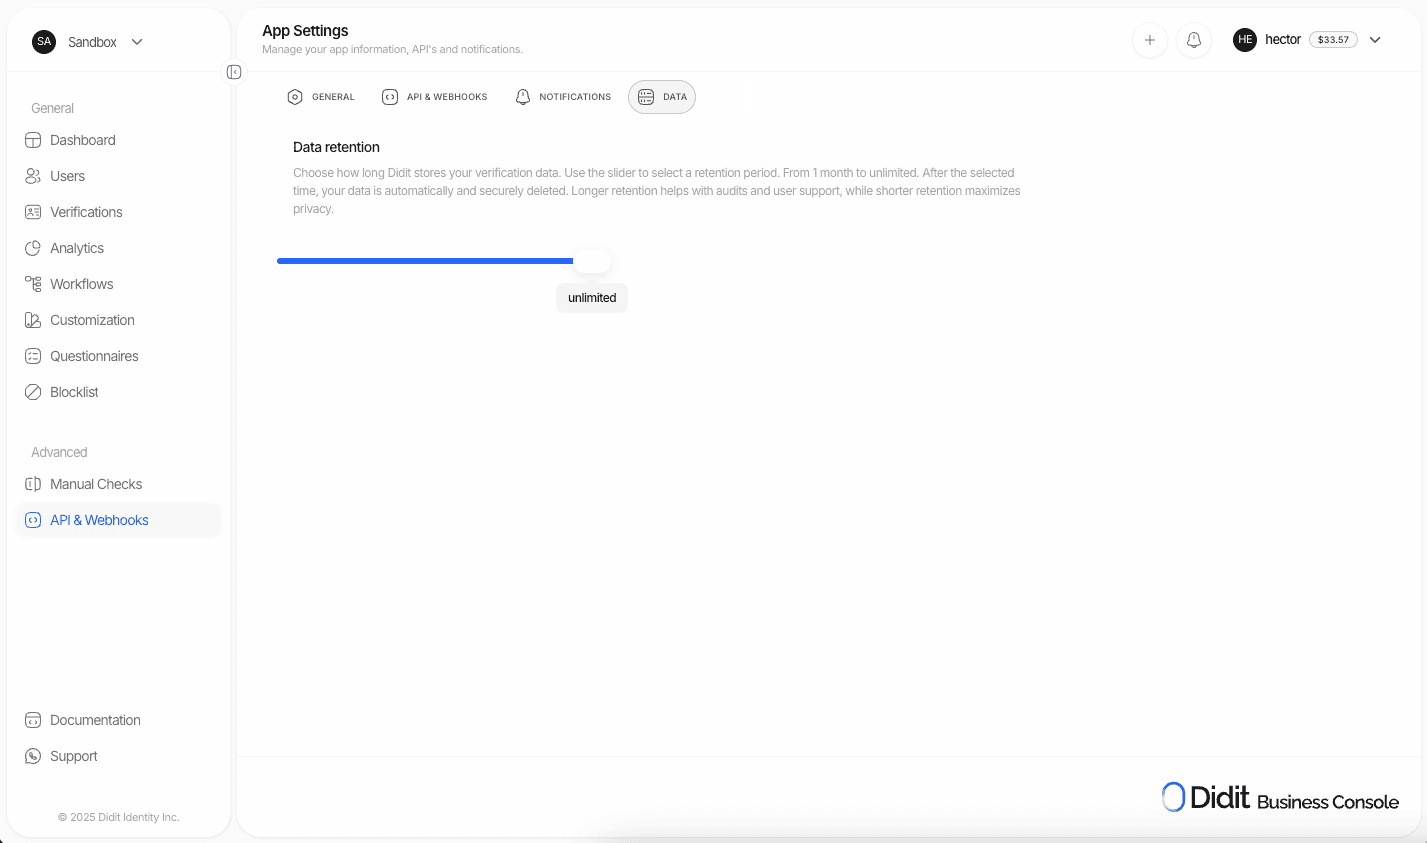
Configure retention in Business Console → App Settings → Data.1
Open retention settings
Go to Business Console → App Settings → Data.
2
Choose a retention policy
Select a window from 1 month to 10 years, or leave as unlimited (default).
3
Save
Click Save to apply the policy to all future and existing sessions.
Manual deletion
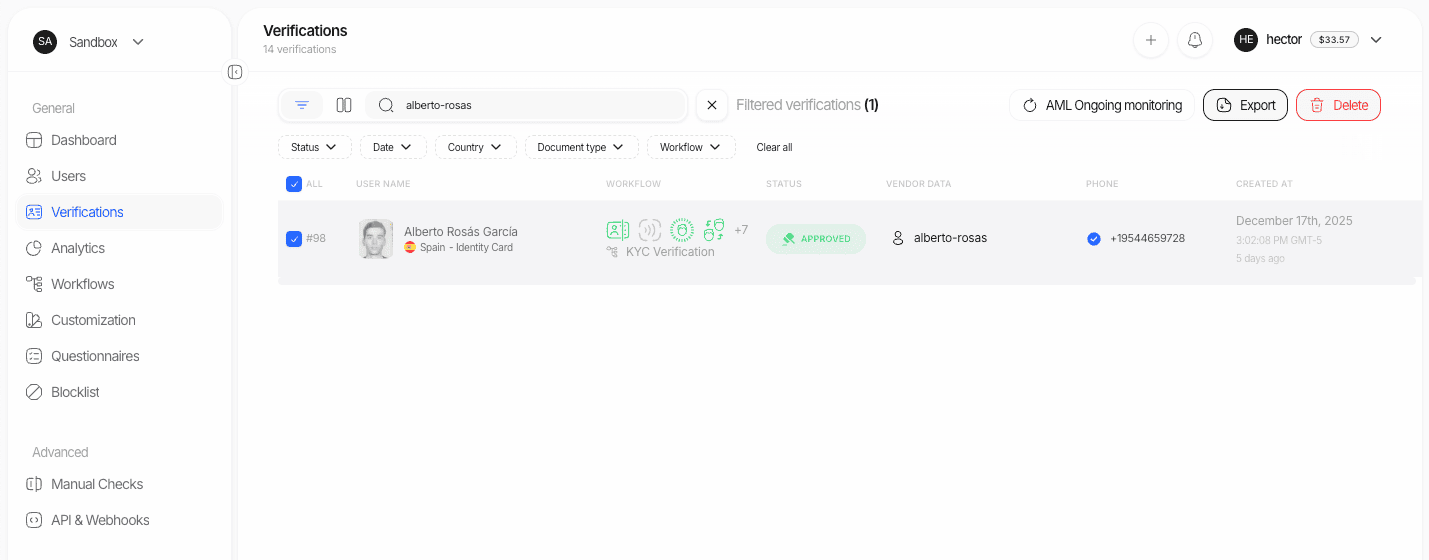
Delete individual sessions from the Console when you need one-off removals.- Navigate to Dashboard → Verifications.
- Search or filter for the target session.
- Click the Delete button (top-right) and confirm.
Programmatic deletion
Delete a session via the API at any time by calling the Delete Session endpoint.
For a data-subject erasure request, send
{"deletion_instruction": "privacy_erasure"} in the body so that any retained biometric template for that person is purged as well.
Biometric template retention
Every KYC session with a liveness selfie carries a face embedding that powers duplicate detection and Face Search 1:N. By default that embedding is deleted with the session, so a person whose session you deleted can verify again without being flagged as a duplicate. Workflows whose Liveness step has automatic Face Search switched off never store that embedding in the first place, so retention has nothing to keep for their sessions. If you delete sessions soon after approval but still need to catch repeat sign-ups, enable biometric-template retention. Didit then deletes the session and all of its data as usual and keeps one separately managed, image-free face biometric template anchored to the User.Enable it
1
Open retention settings
Go to Business Console → App Settings → Data.
2
Turn on Retain biometric template
Select Retain until scheduled expiry or earlier deletion. The setting reads: Keeps an image-free face biometric template for tenant-scoped duplicate detection after an operational session deletion. It remains biometric data and is deleted on its configured schedule, applicable-law deadline, User deletion, privacy-erasure request, or explicit purge.
3
Set a finite retention period
Enter the number of days (1 to 3650) a template may be kept. The setting cannot be saved without it. Didit applies the shorter of this period, your general retention window, and any deadline you send on a deletion call.
4
Save
The policy applies to deletions from now on. No existing template is created or purged by changing the setting.
PATCH /v3/webhook/:
Existing applications stay on
delete_with_session until you change the policy. Nothing enables retention on your behalf.
What is retained and what is erased
The retained template is tenant-scoped and used only on your instruction for duplicate-face and multi-account detection, biometric authentication, and your own face lists. It is never used for model training, analytics, cross-organization matching, or Didit’s own fraud processing.
Per-deletion control
Every deletion reports its outcome, and every delete call can override the policy:- Console: the delete confirmation shows whether each session’s template will be retained or deleted. The confirmation reads: This deletes the session and starts deletion of its session data. If biometric-template retention is enabled for this operational deletion, an image-free biometric template remains separately until its scheduled expiry or earlier purge. Privacy-erasure requests also purge the template. Sessions without a User cannot retain a template and are marked as such.
- API: send
retain_face_embeddings,face_retention_days,face_retention_deadline,deletion_instruction, andinstruction_idon Delete Session or Batch Delete Sessions.
Two kinds of deletion instruction
When a template is purged
- You purge it in Lists → Biometric templates or through the Biometric Templates API.
- You delete the User with Batch Delete Users.
- You delete any session of that User with
deletion_instruction: "privacy_erasure". - Its retention period ends. Didit purges it automatically.
Where to see them
- Lists → Biometric templates lists every template with its User, source, retained and expiry dates, and status, with single and bulk purge.
- Users → [user] → Biometric templates shows the templates anchored to one User.
- The Biometric Templates API exposes the same data and actions, and every retain and purge is recorded on the audit trail.
Retained templates are covered by the biometric-data terms of your DPA. Nothing in this page is legal advice: you remain responsible for the legal basis, notices, consent, and the retention period that applies to your users.
Process-and-purge pattern
For maximum data minimization, process verification data through Didit and purge it immediately after receiving results via webhooks.1
Create a session
Your backend calls the Create Session API.
2
Didit runs checks
Identity, liveness, AML, and any other configured checks execute automatically.
3
Receive webhook
Didit sends a webhook with
status, session_id, vendor_data, and full verification data.4
Persist only what you need
Store the minimum fields required for your records (e.g.,
status, vendor_data).5
Delete from Didit
Call the Delete Session API for that
session_id to delete the session and its data from Didit. If you rely on duplicate detection across future sign-ups, enable biometric-template retention first; otherwise the face embedding is deleted too.Security and assurance
ISO/IEC 27001
ISMS in place. Certificate and excerpts available on request.
Penetration testing
Periodic third-party penetration tests with tracked remediation.
No known breaches
No security breaches reported to date.
Internal security team
Dedicated cybersecurity team with least-privilege access and strict environment separation.
All API activity is recorded in Audit Logs for security, compliance, and troubleshooting. Logs are retained for 365 days and then auto-deleted.
Privacy-minimized storage
We are adding features that let you retain only selected data fields — for example, keepstatus and vendor_data while auto-purging heavier artifacts like images and documents. This gives stricter control for teams operating under data-minimization principles.
FAQ
Can I set different retention per environment?
Can I set different retention per environment?
Yes. You can configure different retention policies for each application you have in Didit.
Can I export data before deletion?
Can I export data before deletion?
Yes. Export session data via the Console or API, then call the Delete Session endpoint.
Will a deleted user still be caught as a duplicate?
Will a deleted user still be caught as a duplicate?
Only if you enabled biometric-template retention before deleting their session. By default the face embedding is deleted with the session and the person can verify again without a duplicate flag. See Biometric template retention.
Where can I see who accessed what?
Where can I see who accessed what?
Use Audit Logs in the Console. Filter by user, endpoint, or date range. Logs are retained for 365 days.
Implementation checklist
1
Configure retention
Set your retention policy in Console → App Settings → Data.
2
Subscribe to webhooks
Set up webhooks and verify signatures.
3
Persist minimal fields
Store only the fields your business requires.
4
Implement programmatic deletion
Call the Delete Session API if you use the process-and-purge pattern.
5
Confirm processing region
Verify your processing region (EU by default, or in-country for enterprise).
6
Separate environments
Use separate Sandbox and Live API keys with independent retention policies. Rotate keys regularly.