Customization
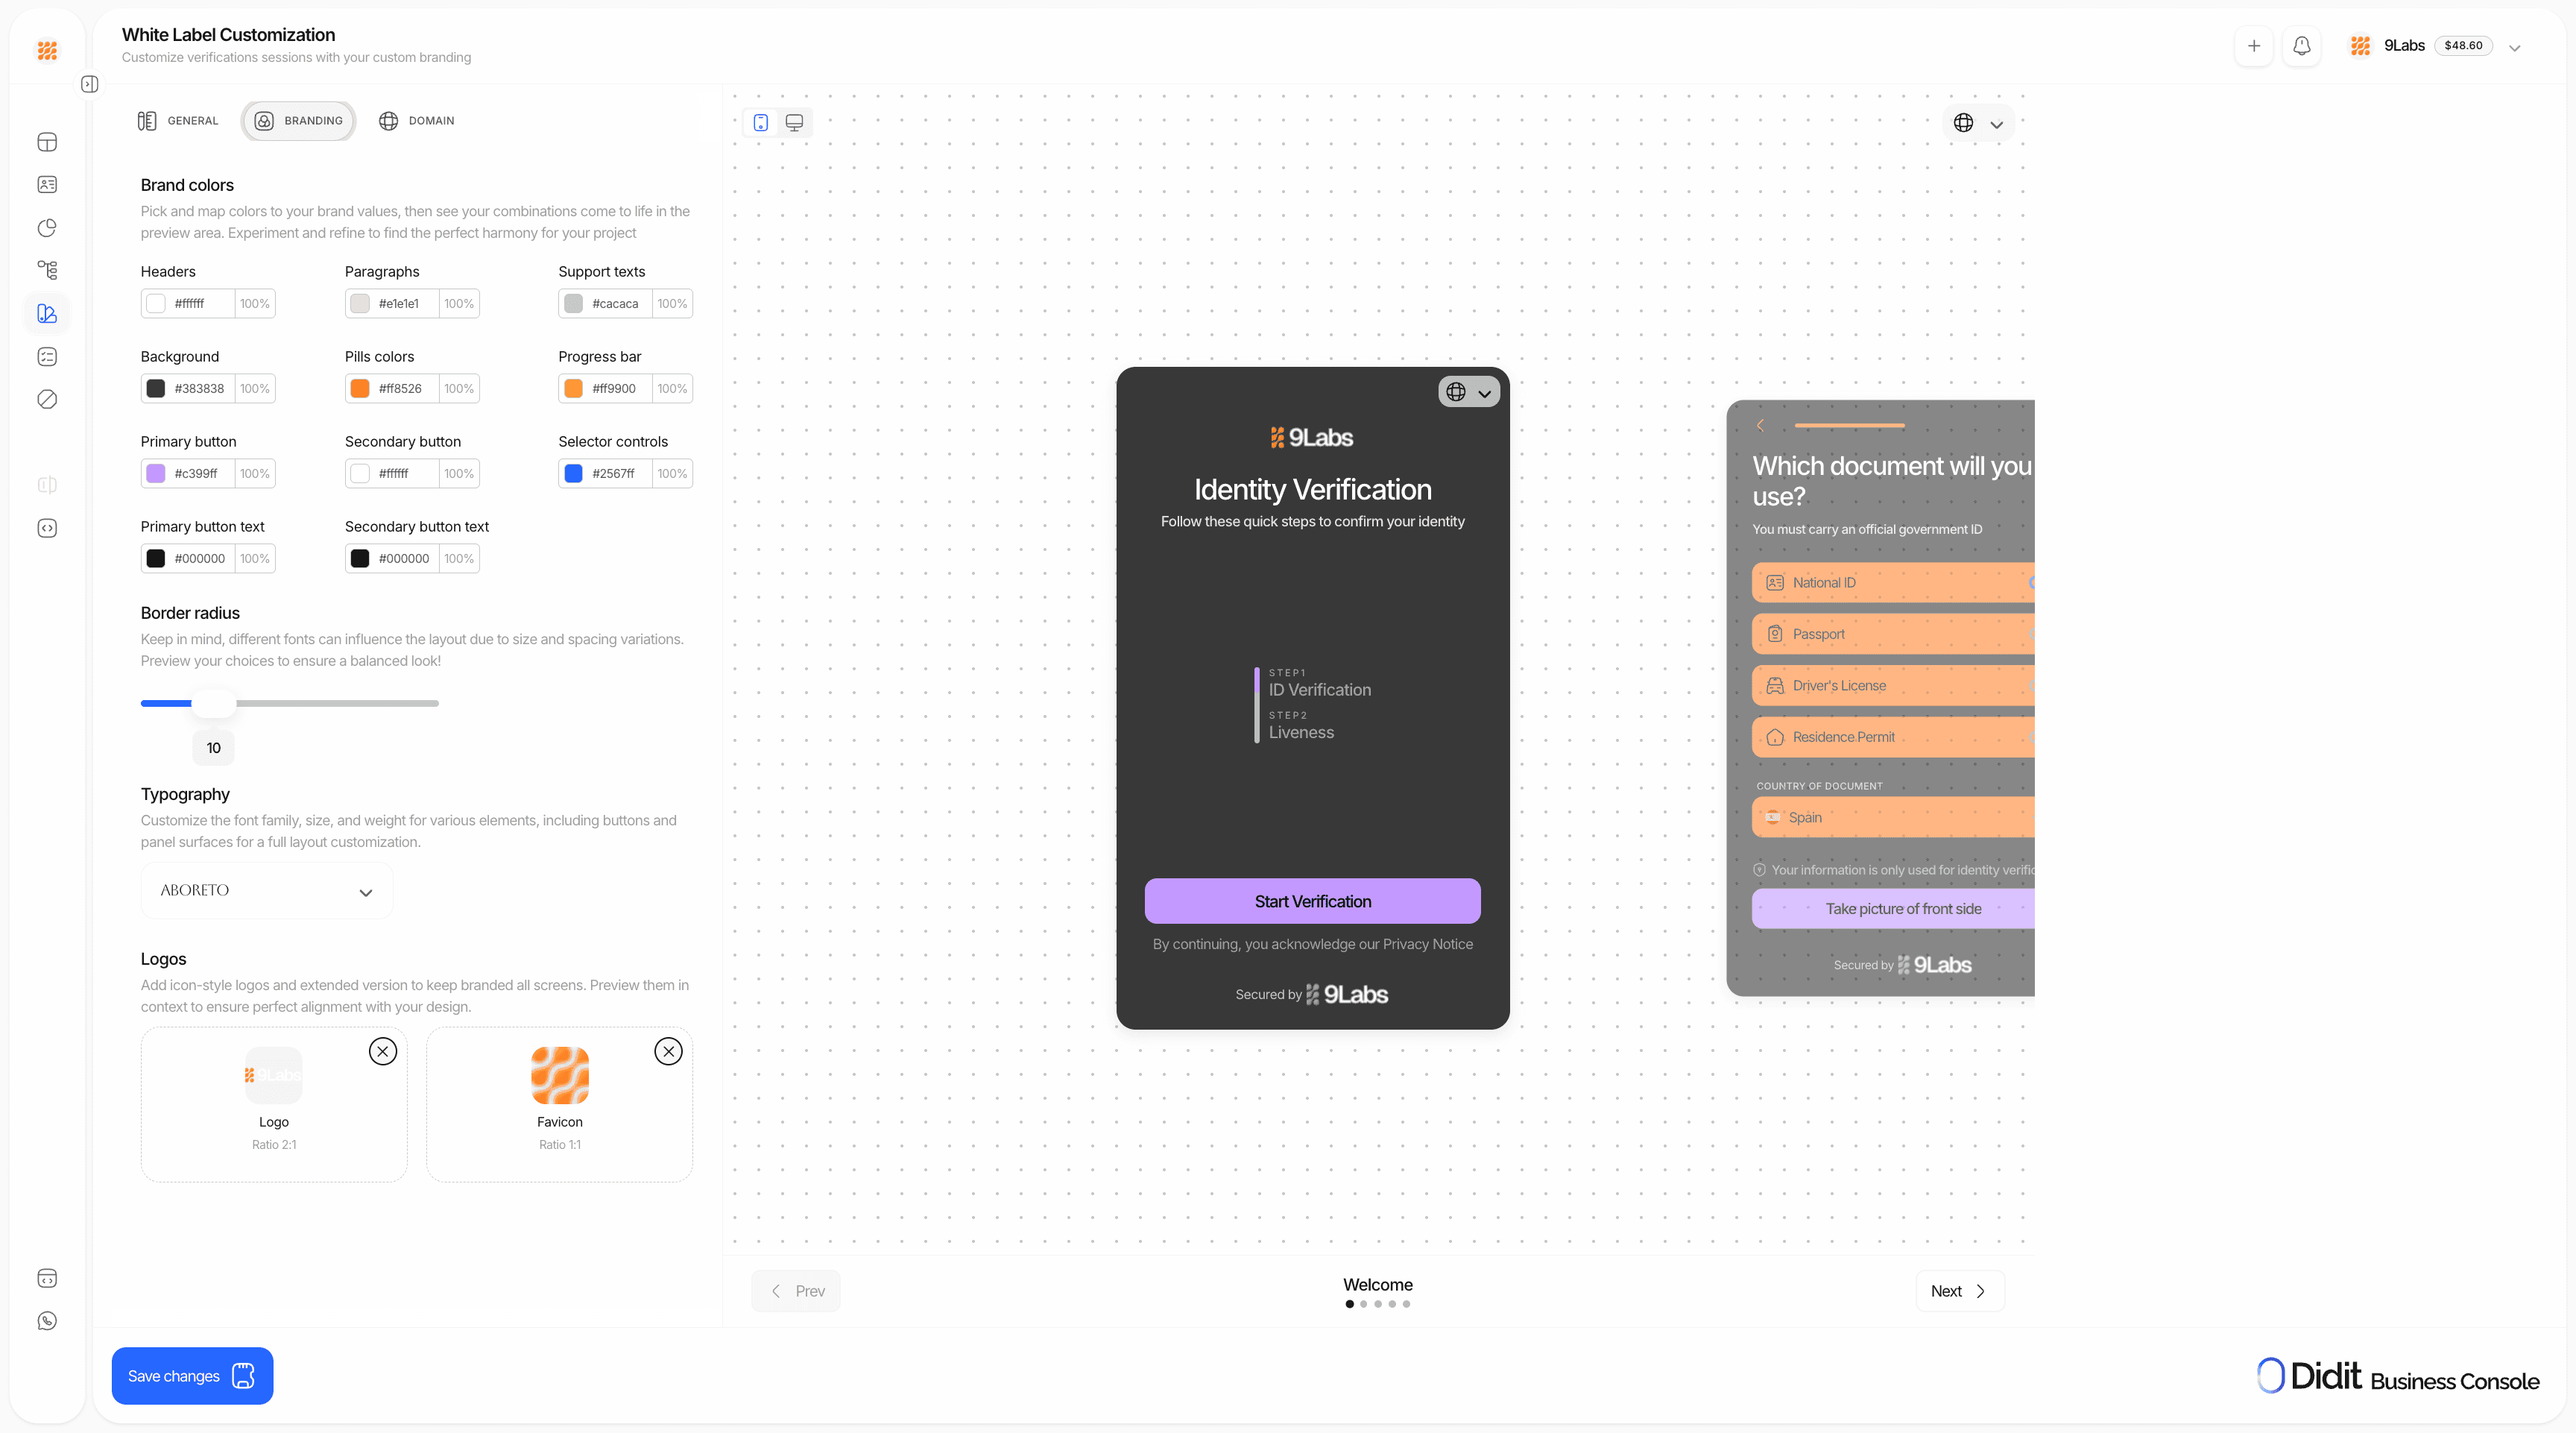
In the Style Editor you can customize everything in the verification UI:| Category | What you can customize |
|---|---|
| Colors | Buttons, text, panels, backgrounds — every color element |
| Typography | Fonts that match your brand |
| Logos | Square and rectangular logo uploads |
| Layout | Border radius for panels and buttons |
| Login screen | Show or skip the login screen |
| Custom domain | Host on your own domain instead of verify.didit.me |
Activate custom style in your workflow
After configuring your custom style, you must enable it per workflow for it to apply:- Go to Workflows in the sidebar
- Open the workflow you want to brand
- Click Settings (or the gear icon)
- Under Options, find Include custom style
- Enable the toggle
Custom styles only apply to workflows where Include custom style is enabled. If you don’t enable it, the workflow will use the default Didit branding.
Setup
Configure visual elements
- Select your brand colors using the color picker
- Upload logos in both square and rectangular formats
- Adjust typography and border radius settings
Set up custom domain (optional)
- Add your domain in the White Label settings
- Configure DNS settings as instructed
- Verify domain ownership
Enable in your workflow
For each workflow that should use your branding: Workflow → Settings → Options → Include custom style → enable.
Compliance responsibilities in white-label flows
White-labeling changes the branding of the verification flow. It does not remove your obligations as the controller of that user journey. Before you launch a white-label flow, make sure you:- Tell the end user that your company is requesting the verification and that Didit powers the verification workflow.
- Link to your own privacy notice and any controller-side legal terms that apply to the journey.
- Link to Didit’s Verification Privacy Notice and End User Terms for Identity Verification.
- Collect explicit affirmative consent before document capture, selfie capture, liveness, or biometric processing whenever the applicable law or your legal position requires it.
- Keep any proof of notice or consent that your legal team requires in your own systems.