

 Get Started
 Integrate / SDKs
 User Verification
 Business Verification
 Transaction Monitoring
 Changelog
Two Ways to Build Questionnaires
Didit offers two distinct approaches to creating questionnaires, allowing you to choose the right level of complexity for your needs: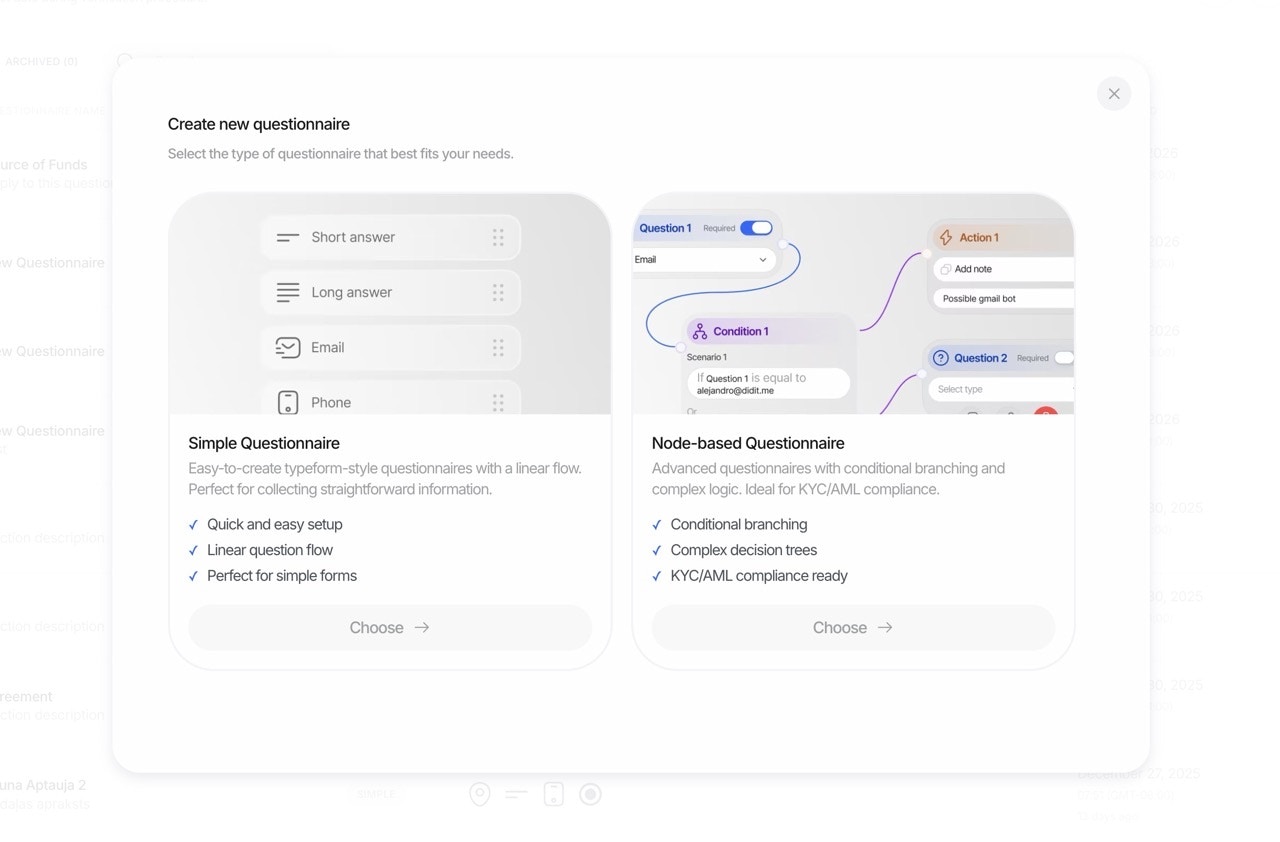
1. Simple Mode: Quick Form Builder
The Simple Mode is perfect for creating straightforward forms quickly. Use our intuitive drag-and-drop interface to add elements, set required fields, and publish in minutes.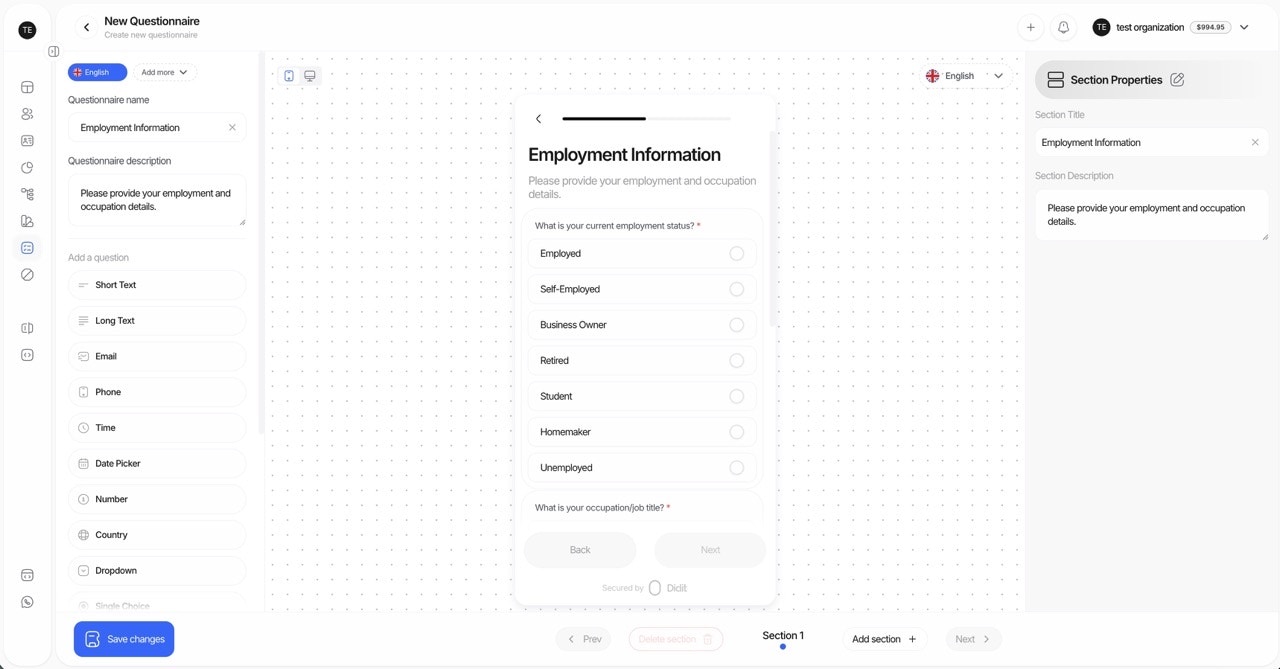
- Quick data collection forms
- Simple surveys and attestations
- Teams new to form building
- Single-language questionnaires
- Open the Questionnaire Builder
- Drag elements from the palette onto your form
- Configure each element (label, required, placeholder)
- Preview and publish
2. Advanced Mode: Visual Graph Builder
The Advanced Mode unlocks powerful features for complex data collection scenarios using a visual node-based editor. Build sophisticated questionnaires with conditional logic, branching paths, and full control over flow.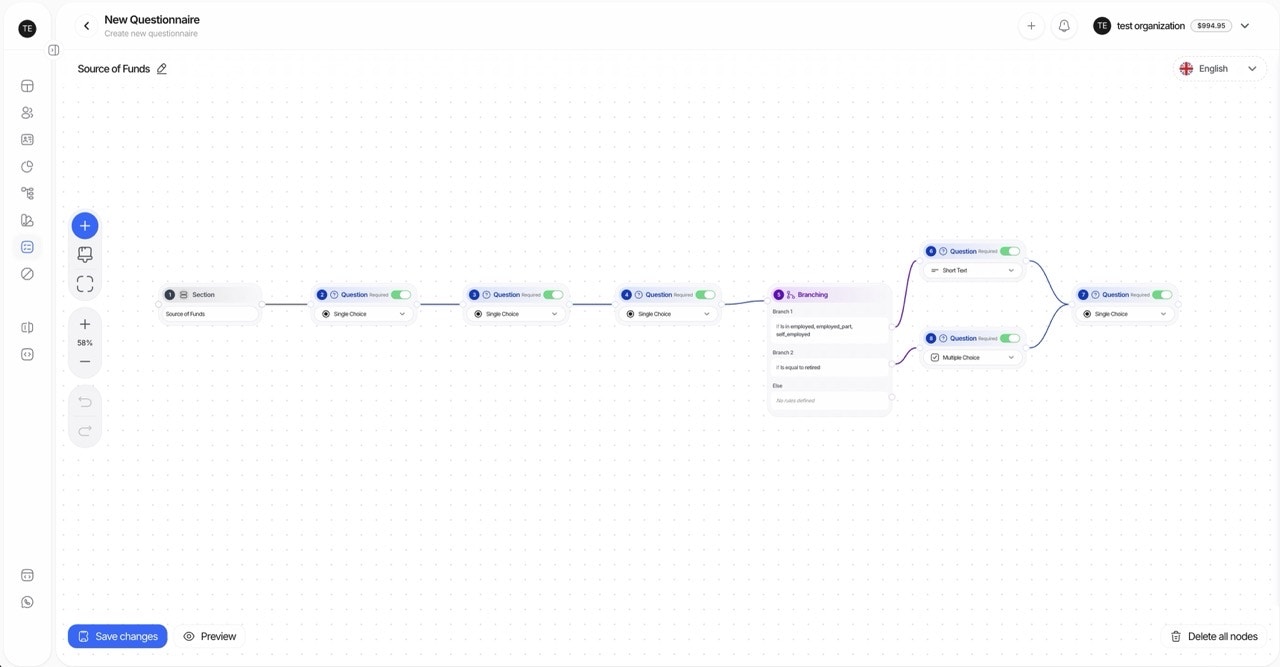
- Multi-language questionnaires
- Complex forms with conditional branching
- Compliance-driven data collection with different paths
- Forms requiring manual review workflows
- Visual node editor: Drag, drop, and connect nodes on an infinite canvas
- Smart connections: Drag from a node handle to empty space to instantly create and connect a new node
- Conditional branching: Route users to different questions based on previous answers
- Multi-language support: Translate all user-facing content
- Keyboard shortcuts: Undo (Ctrl/Cmd+Z), Redo (Ctrl/Cmd+Shift+Z), Delete (Delete/Backspace)
- Zoom and pan: Navigate complex forms with scroll-to-zoom and drag-to-pan
Graph Builder Node Types
Connection Rules: Section and Text nodes can connect to Questions and other Text nodes, but not directly to Branching nodes. Branching nodes can connect to any node type.
Questionnaire Templates
Templates help you get started quickly with pre-configured forms for common use cases. You can use them as-is or customize them to fit your needs.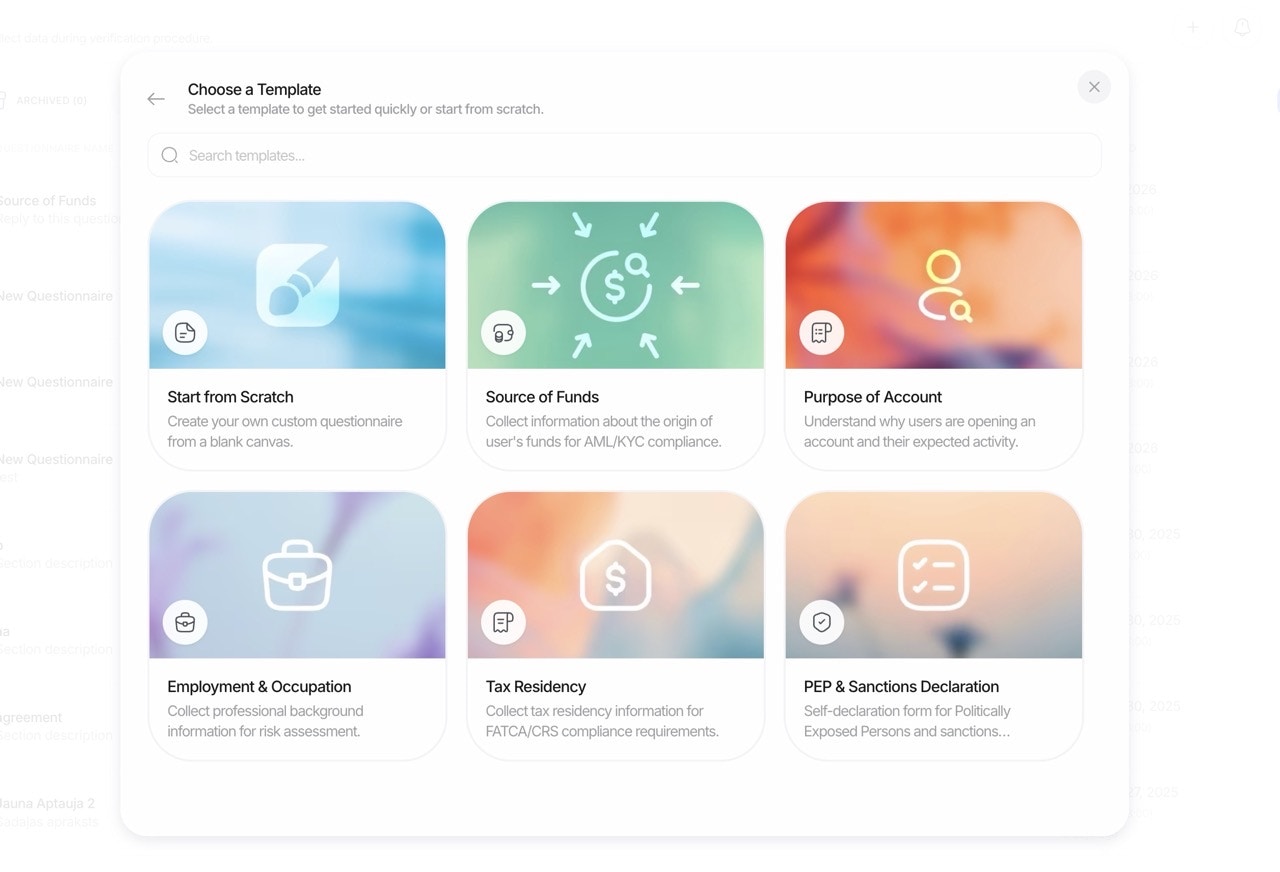
Pre-Built Templates
How it works
Our questionnaire workflow is designed for flexibility and auditability:1. Build in the Console (No Code)
- Drag and drop elements to create your questionnaire
- Organize content into multiple sections for clarity
- Mark elements as required or optional
- Configure placeholders and helper descriptions
- Add choices (with optional free-text follow-up) for dropdown and single-choice
- Configure file/image upload limits per element
2. Localize Content
- Write your content once in the questionnaire’s
default_language - Define the supported
languages— when you publish, every title, description, placeholder, choice label, and validation message is translated automatically into all of them - Fine-tune any translation by hand in the builder; manual edits are preserved until the source text changes
- The end-user sees content automatically in the best available language
3. Publish and Collect
- Activate the questionnaire and embed it in your verification flow
- End-users complete the sections and submit answers
- File uploads (documents, images) are stored and linked to the response
4. Review and Decide
- Responses are saved with a
status:Approved,In Review, orNot Finished - You can force all questionnaire responses to go
In Review, so a person manually approves them - Review answers and files in the console, then mark as
Approved
Note: Questionnaires do not produce risk warnings. Governance is achieved through required fields, validation, and review workflows.
Key capabilities
Full feature list:
- Visual Builder: Create and manage questionnaires with an intuitive drag-and-drop editor
- Sections: Group related questions; add headers and separators to guide users
- Automatic translations: Write content in one language — all user-facing text is translated into every other selected language on publish, with manual fine-tuning supported
- Validation: Mark fields required; enforce max files per upload element
- Choice Logic: For dropdown/single-choice, optionally require additional text per selected option
- Uploads: Collect documents and images with file count limits (e.g., up to 3 files)
- Manual Review: Optionally force all responses to
In Reviewpending human approval - Activation Toggle: Enable or disable the questionnaire per application
- Workflow Integration: Add questionnaires to KYC or run them standalone as a Questionnaire Verification workflow
- APIs & Webhooks: Read structured results via API and receive updates
Element types
You can add the following element types in the builder (selectable from the console):Input Elements
Choice Elements
Upload Elements
Layout Elements
Behavioral notes:
SECTION_HEADERandSEPARATORare presentation-only. They ignore required/placeholder/choices/file limits.- For choice elements, define choices as
{ label, value, requires_text_input? }. - For upload elements, set
max_files(1–5) to control how many files can be attached.
Forcing manual review
Some compliance workflows require human review of every response. From the console, you can set questionnaires to always result inIn Review. A reviewer then approves or requests changes, after which the response becomes Approved.
When to use manual review:
- High-risk customer onboarding
- Sensitive data collection (Source of Funds, UBO declarations)
- Regulatory requirements for human oversight
- Quality assurance during initial rollout
Example use cases
Source of Funds
Capture income sources, amounts, and upload supporting documents (e.g., payslips, statements). Combine dropdowns, long text, and file uploads. Typical structure:- Section 1: Employment Status (Dropdown)
- Section 2: Income Sources (Multiple Choice + Long Text)
- Section 3: Supporting Documents (File Upload)
- Section 4: Declaration (Consent)
Association or Membership
Record affiliations, roles, and proof of membership; include consent elements for declarations. Typical structure:- Organization Name (Short Text)
- Role/Position (Dropdown)
- Duration of Membership (Date Picker)
- Membership Proof (File Upload)
- Declaration (Consent)
Purpose of Relationship & Expected Account Activity
Collect intent, expected transaction volumes, countries of activity, and anticipated counterparties. Use single/multiple choice, number inputs, and paragraphs for context. Typical structure:- Section 1: Account Purpose (Multiple Choice)
- Section 2: Expected Monthly Volume (Number + Dropdown for currency)
- Section 3: Countries of Activity (Country - multiple)
- Section 4: Transaction Types (Multiple Choice)
- Section 5: Additional Information (Long Text)
Simple vs Advanced Mode: When to Use Each
Getting Started
- New to questionnaires? Start with Simple Mode to learn the builder
- Need translations or conditional logic? Switch to Advanced Mode for the visual graph editor
See how results are structured in the Questionnaires Report page.